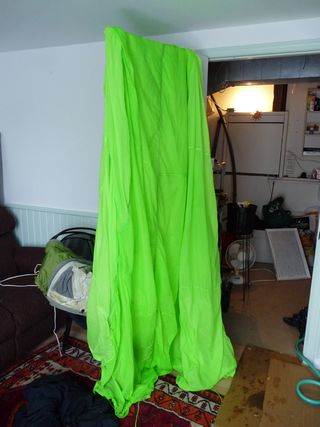
In case you have a decomissioned parachute lying about and you've ever wondering how to dye it, here's your How To!
I bought a parachute last year at a surplus store thinking I was going to use for a certain project but it didn't work, so I kept it, knowing that 28' of nylon fabric would someday come in handy. I have an idea of what I am going to do with the parachute for this new project, but it is still in a R & D phase and dyeing seemed like the first step. As always with a new idea, I must remind myself to trust 'the process' of art making, even if I don't fully know the outcome. It will come. In any case, my cat Charlie enjoying exploring the material.
I had to conduct this dyeing day at my home, instead of at my studio. Dyeing requires proximity to a washer and dryer and accessible water. I set up a decent space in the basement and backyard. First step: cut the parachute into 4 manageable pieces. The piece of the far right has some velcro strips sewn onto its edges. This is a test to see it I can put the parachute back together again at some point. Velcro will be added to the other pieces after dyeing.
Prewash each piece in the washing machine with synthrapol.
My outdoor set up was: 100L stock pot, a double burner outdoor stove connected to a BBQ tank. I shovelled out a space in the back yard. It was the prettiest, somewhat mild day at -5, with light snow falling. It was preferable to the -30 windchill we've had lately. Again, my cat Charlie approves of the set up and enjoyed exploring in the snow.
I filled the stock pot about 1/3 of the way, with enough water to cover the fabric of 1/4 parachute. Turn on the burner and heat up the water.
I am using G & S Acid dye in #628 chartreuse. They recommend 2%-4% dye x WOF (weight of fabric). I used 15grams of dye for 2lbs of 1/4 parachute piece. It is also recommended to test dye fabric extensively before doing the whole lot, but since I wanted to maintain the integrity of the parachute (after cutting it in 4), I didn't want to go cutting more bits of it off to test it. I took my chances and was willing to live with how it turned out.
Add washed wet parachute to the dye bath. Stir it up. Add about 1 3/4 cups vinegar to the mix.
Let it dye for about 30 minutes. Stir occasionally.
After 30 minutes, remove fabric from the dye bath, wash again through a machine cycle with synthrapol and then a rince cycle. Run through the dryer. Remove water/dye from the stock pot. Repeat all the steps 3 more times for each quater of a parachute. I am amazed at the brilliant, almost fluorecent green it turned out. It was not at all what I expected. But I have a fondness for shockingly bright colours, so I am very pleased with the results. I think if I had aimed to dye it fluorescent green, it would never have turned out this way.
I also dyed a few samples of other fabric that I may be using for this project. Left square is the spandex I will be using and the square beside it is the 'chartreuse' dye results. The gausy fabric on the right is a silk organza and was white before dyeing. It turned out a blue/green with the 'chartreuse' dye. So different...and this is why it is so important to test!
It was a fun afternoon of water, fire and colour. It was exciting progress being made on this new project and I'm looking forward to the next phases of development!


